


FABRIC & CUTTING
🧵 Assorted Scraps for the border - CUT 22- 4 1/2" x 4 1/2"
🧵 White Fabric- CUT 1- 8 1/2" x 8 1/2" block ( for the snowman head)
🧵 White Fabric- CUT 1- 8 1/2" x 20 1/2" rectangle ( for snowman body)
🧵 Blue Fabric- CUT- 4 - 2 1/2" x 2 1/2" squares ( for snowman head)
🧵 Orange scrap for nose 3" x 8" ( carrot nose)
🧵 Black Fabric - Cut 3 - 4 " x 4" squares ( snowman's buttons)

USE A 1/4" SEAM ALLOWANCE
DIRECTIONS
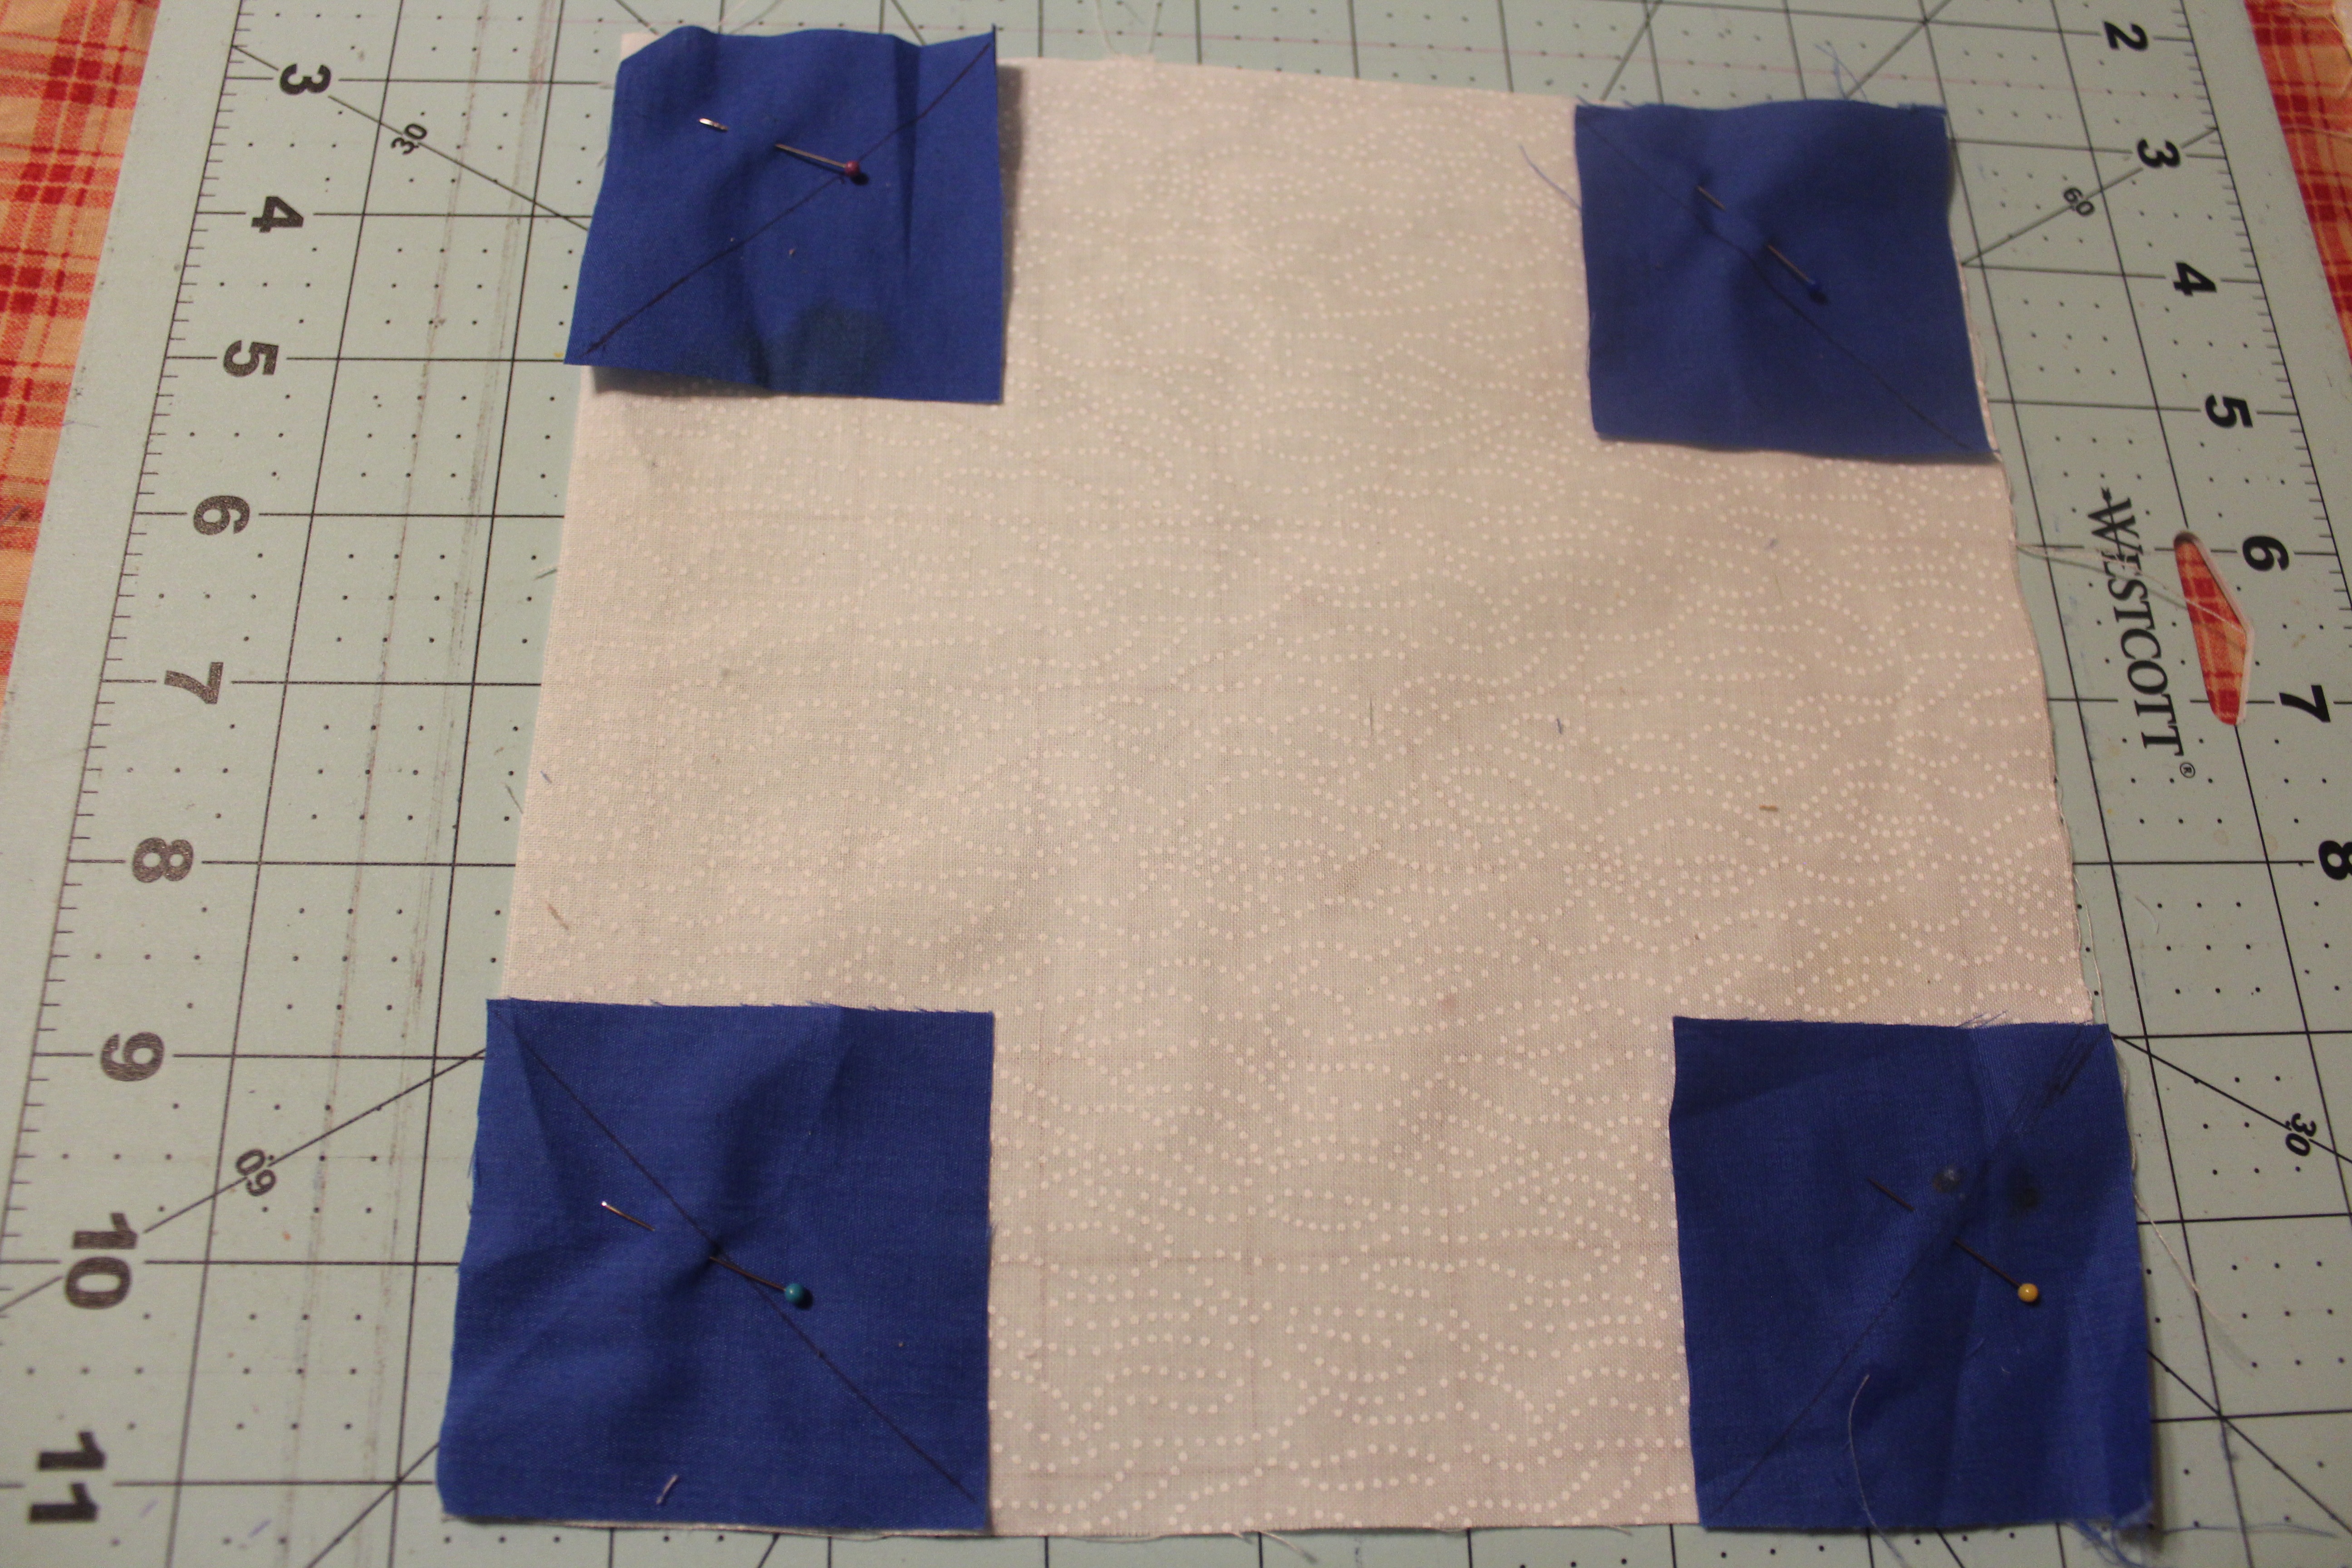
1. On the backside of each of the the 4 blue 2 1/2" squares draw a diagonal line .

2. Lay each of the 2 1/2" squares face down at each corner of the white 8 1/2" square.

Pay close attention to the direction your drawn diagonal line is going for we are making a Snowball block. Pin.
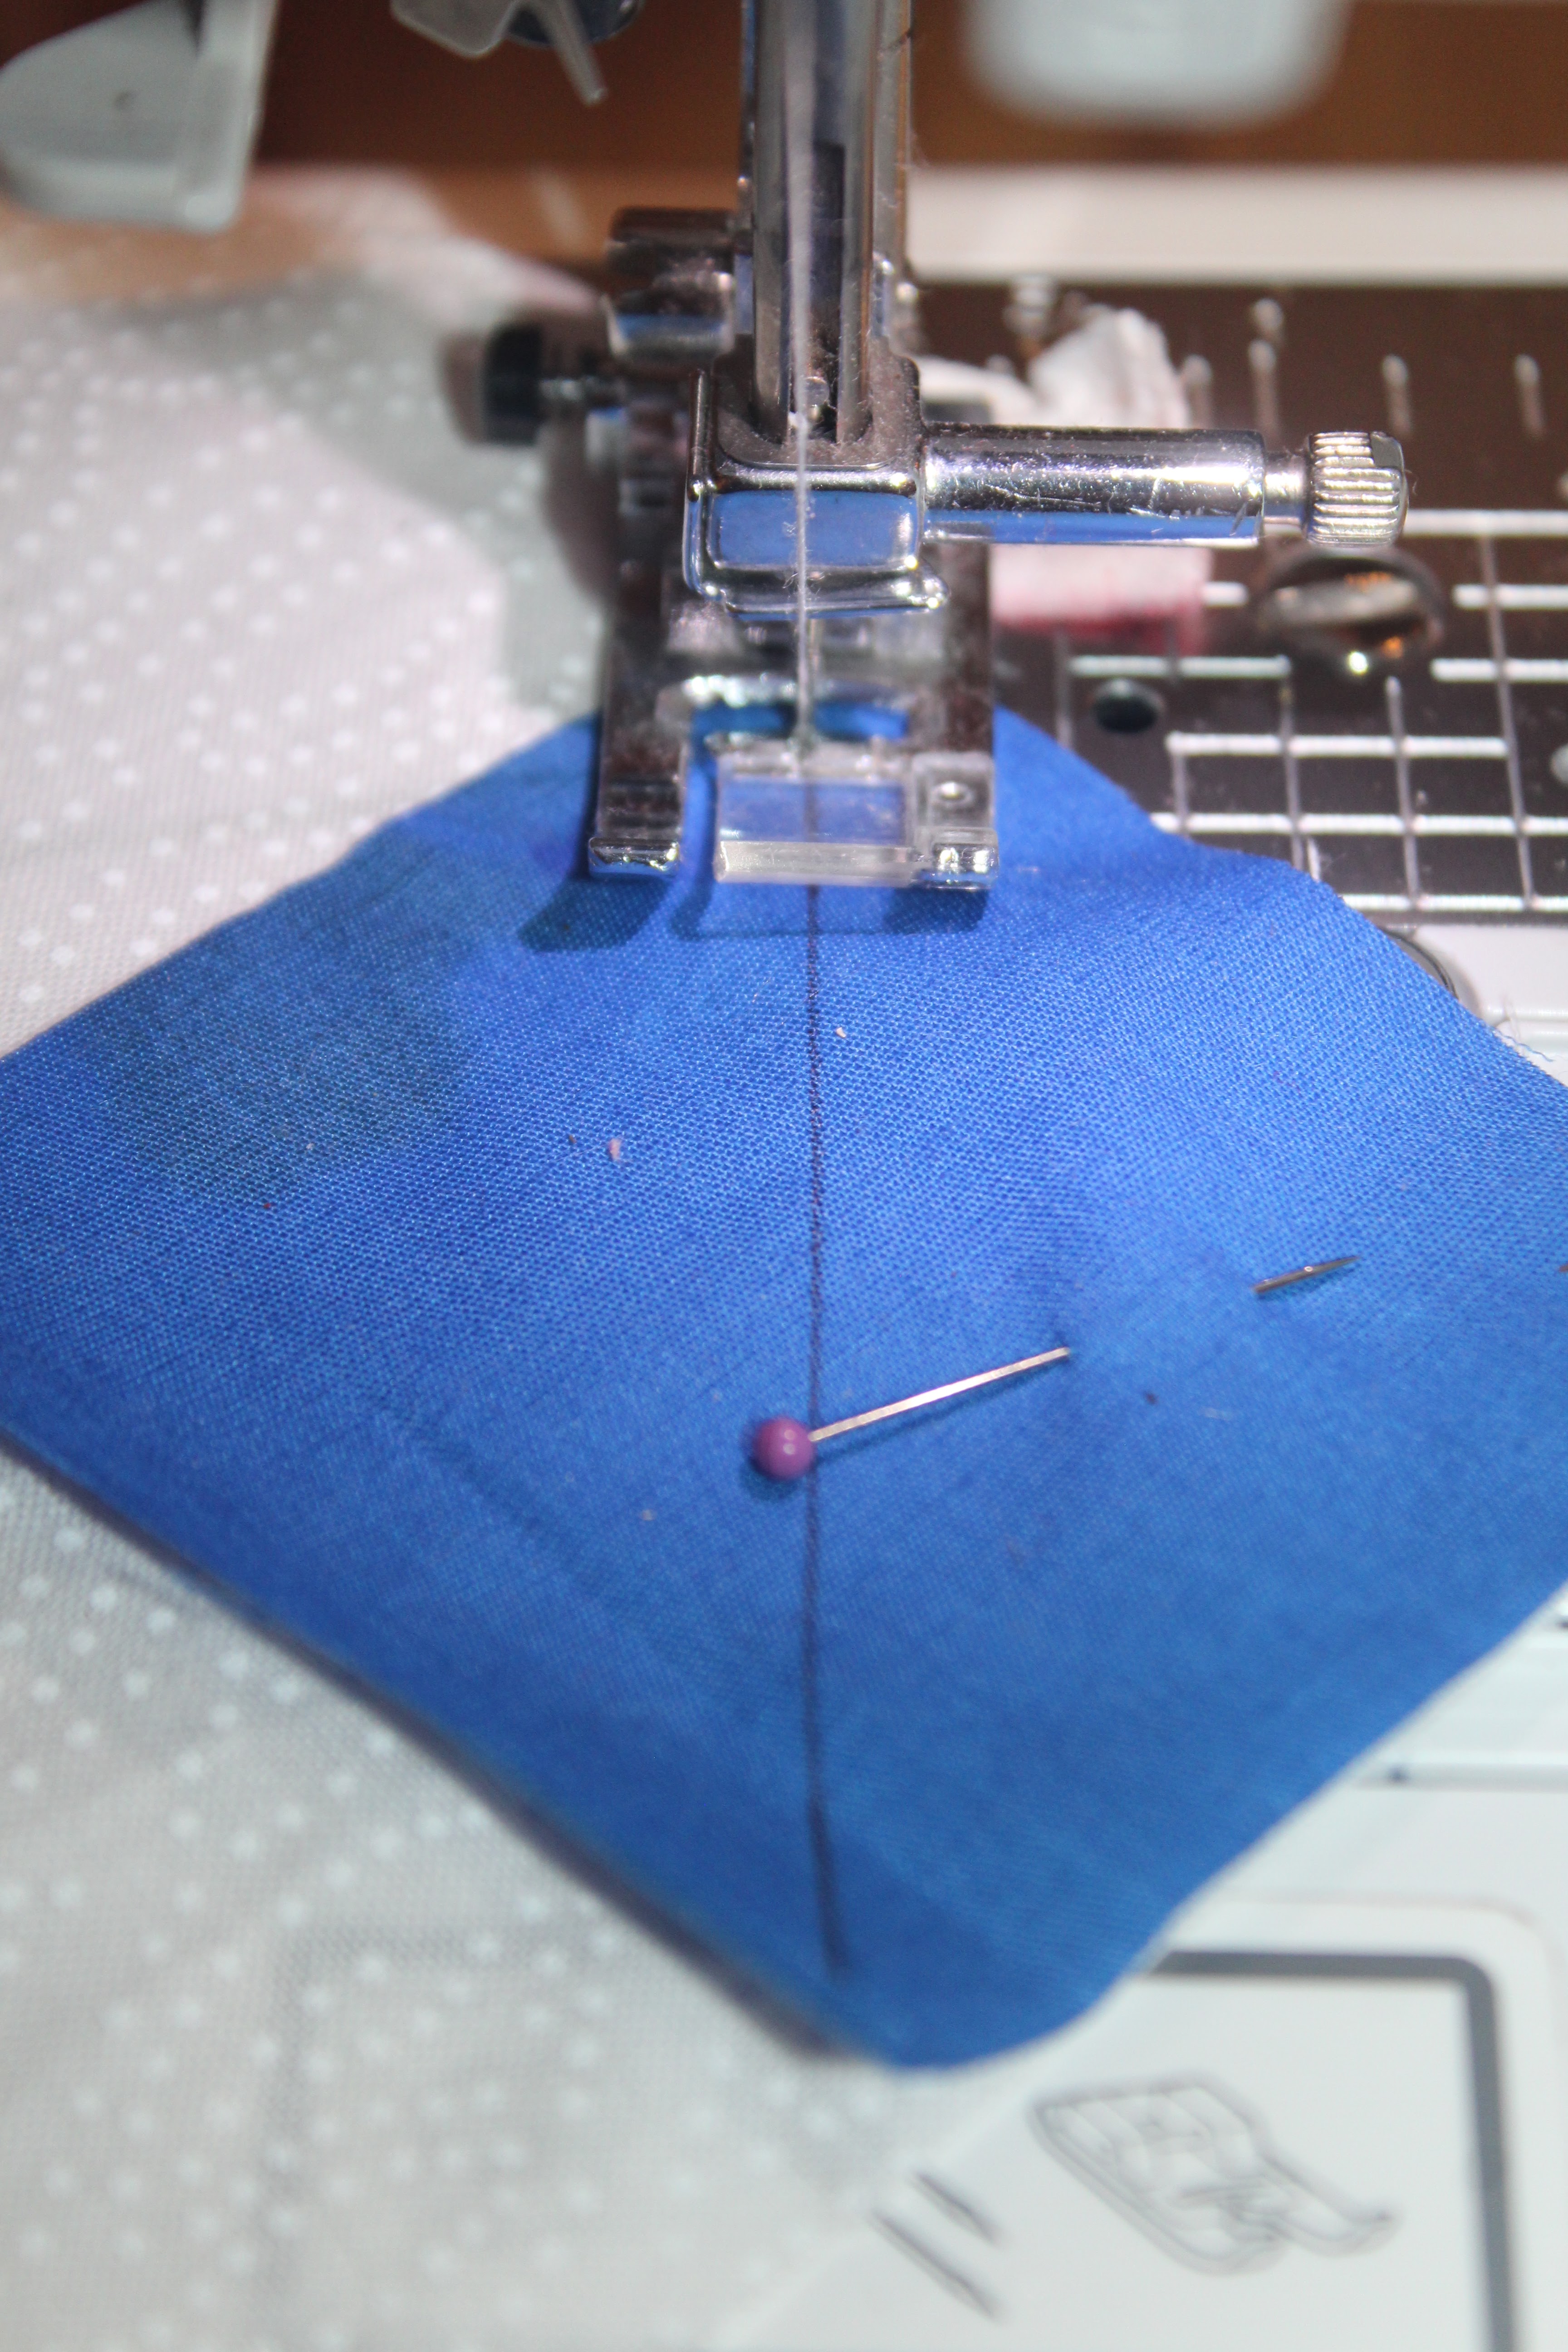
3. Sew down the diagonal line for each of the 4 corners.

4. Cut the bottom triangles off of the Snowball Block 1/4" away from the seam. Press.


5. Now sew the Snowball block ( the head ) to the 8 1/2"x 20 1/2" white rectangle ( body). Press.

6. We are now going to piece the border. Lay out your 22 4 1/2" squares around your snowman in a pleasing manner.

7. Take the 2 squares just above the snowman's head. Right sides together sew these 2 blocks together. Press. Repeat the same step for the 2 squares at the bottom of the snowman's body.

8. Sew the units that you created in step 7 to the top and bottom of the snowman. Press

9. Sew the 9 - 4 1/2 squares into strips for the right border. Press. Repeat the same for the left border.

10. Sew the right border to the snowman . Press . Repeat for left border.

11. Wahlah!!! Our piecing is complete. Now it is time for the applique . You may have to enlarge the image when printing.

Using the template , from your orange scrap cut out a carrot nose. If you are using the needle turn applique method , be sure to add a 1/4 turn under allowance.
If you are unfamiliar with needle turn applique, I always enjoy watching Jan Patek on Youtube. She does a phenomenal job explaining.


13. Draw big Xs for the snowman's mouth. Embroider in black .
14. Add 2 large buttons for eye.
Wasn't it fun to build this snowman? This guy will go into the hoop in the near future.

The original quilt was hand quilted with hand drawn swirls and twirls.

It was a delight to share this snowman with you . Thank you so much for dropping by for a visit. Have a beautiful day and...
As Always...
Happy quilting and stitching, ya'll
Melisa
Snowmen fall from heaven one flake at a time.
Hugs and Stitches and Warm Winter Wishes !!!🤗❤🧵
Ya'll come back now, ya hear !


I love your saltbox patterns, and appreciate you sharing them with us. Can you tell me specifically which color/ brand aida you use. I see the instructions say tea/coffee dyed, but there is so much variation, and I often find the color I choose does not contrast well enough with some threads.
ReplyDeleteOh thank you so much, MJ. I usually buy Charles Craft white aida 14 count or sometimes even an off brand and dye the fabric myself for an aged look. I posted how I dye my fabric in my Sept. 15, 2022 post; so you might want to check that out. If I do not think my fabric is dark enough, I usually redye it. Each time it comes out different, but my personal favorite is the darker fabric. I hope this helps. If you have any other questions, please do not hesitate to message me. Happy stitching.
DeleteI love this snowman! Thank you for sharing him! Your hallway is wonderful and very welcoming!
ReplyDeleteBlessings
Oh thank you so much, Donna; my little hall way is one of my favorite places to decorate with little quilts. I pieced this little snowman up in just a couple of hours; I look forward to having him quilted very soon. Have a great week, dear.
DeleteMy Mom lives in assisted living this would be great for her front door. Thank you for sharing your pattern. I am a quilter and stitcher. Love you blog.
ReplyDeleteAah thank you so much, dear. I hope you enjoy piecing a little snowman quilt up for your mom; I am sure it would bring her and others so much joy to see it. Have a wonderful week. Happy quilting.
DeleteThank you for the tutorial on how to make your adorable snowman. It is now in my pinker pouch, which is getting mighty full. 😂 have a great day Melisa
ReplyDeleteAaah thank you so much, dear Patti. I sure hope you enjoy piecing up this little guy. I bet you could have him completed in no time. Happy quilting and stitching dear.
DeleteYour snowman is adorable, Melisa! No flakes or flurries here either!
ReplyDeleteOh thank you so much, Robin. He was a fun one to work on. They are predicting a slight chance of snow on Thursday here so it might be headed your way. Lol. Stay warm and cozy
DeleteYes I have admired this one for a while too:) Thanks for the tutorial.
ReplyDeleteOh thank you , Vicki. You would have this one stitched up in no time as prolific as you are. Have a great day and thank you for the sweet visit.
DeleteWhat a fun little project! We're expecting 4-6" of snow starting tomorrow night. Maybe you'll get a little out it too!
ReplyDeleteOh wow, Susie. I hope the weather does not get too rough in your area. They are predicting a slight chance of snow on Thursday. Fingers crossed we will get a bit . I love snow as long as the electricity stays on. Lol. Stay warm and cozy.
DeleteSo very cute. :)
ReplyDeleteOh thank you so much, Tammy. I was able to whip this little guy up in no time. Have a great day.
DeleteIt has been fabulous, Melisa!!
ReplyDeleteI love this adorable snowman.
Thanks for sharing the step by step and the measures used.
Hugs and happy week
Oh, you are so welcome, Isabel and thank you for the sweet visit. He was a quick and fun guy to work on. Happy stitching.
DeleteThank you for sharing your directions with us Melisa! What a kindness! I have never made a quilt before & I think I need to try this one!
ReplyDeleteAaah you are so welcome, Marie and thank you. This little quilt was easy to whip up. I do hope you give it a try . Have a very lovely week.
DeleteHe is so cute!! Thanks for sharing him with us.
ReplyDeleteYou are so very welcome, Lori . He was so much fun to work on. I do love the fast and easy projects. Happy stitching , dear.
DeleteSEW cute, Melisa!!
ReplyDeleteAaah thank you so much, Brenda. He was such a fun little guy to work on. Hope your week is a fabulous one Hugs.
DeleteIt seems that you can never have enough snowmen in your home. Just as well they dont melt into puddles all over your floor. Thanks so much for sharing how they are constructed, certainly nice and easy.
ReplyDeleteLol I have definitely been on a snowman kick this year, Jenny. I guess because we rarely get snow here and I do enjoy it when we do receive just a tad. Have a great week , dear.
DeleteAdorable ❄️☃️
ReplyDeleteAaah thank you so much, and it was a fast one too, which made it a lot of fun to build. Lol. Happy stitching.
DeleteWe've had 52+ inches of snow in west central Wisconsin so far this season. February and March usually add a bunch more. I would love to send you some. It's been beautiful but I'm ready for spring.
ReplyDeleteOH MY , Lorraine!!!! That is a lot of snow. I can not imagine. I would take two to four inches if you could send it may way. Lol . Only a flurry would cause our schools to close. Lol. I hope all has been well and the snow or ice has not caused the electricity to go off. Stay warm and cozy, Lorraine. With that much snow, I can definitely see why you are ready for spring.
DeleteThank you for the cute tutorial for your snowman. Once again, I am reminded of your confidence in your designs. It always inspires me to have more faith in my own ideas.
ReplyDeleteAaah thank you so much Ginny and am so very honored . My motto is to always have fun with my crafts and to go for it. I hope you create all that your heart and imagination desires. Hugs.
DeleteHow fun in blues! I made one like yours with red all around him. I still love him. I've got the 3rd Frosty McChill stitched and ready to show Wednesday. #4 is traced and ready to start. Thank you so much for the cute patterns.
ReplyDeleteYou made your snowman last year didn't you Deb? Hmmm, now I want one in reds. Lol. It is my favorite color. Aaah I hope you are enjoying Frosty. It sounds like you are rocking the stitching. I can not wait to see him. Happy stitching.
DeleteThank you for this. I think I'm going to get one put together today. I love snowmen, but we haven't had any snow this winter either. Hopefully we'll get at least one good storm before it's over -- fingers crossed! Thank you so much for your blog and your sharing!
ReplyDeleteOh how fun, Susan. I am so honored . I hope you enjoy him. I whipped this one up in just a few short hours so I am sure you will be able to do the same. We are expecting a bit of snow maybe on Thursday so the system might be headed your way. Have a great week. Happy quilting.
DeleteI love your snowman quilt, the new blue version is beautiful too! Though the original has a warmer palette of colors, I like the blue one more since it gives more of the snow and cold feeling, but I love both. Thank you for sharing this tutorial!
ReplyDeleteHugs
Oh thank you so much Diana. It was fun to use different colors and though they are similar; it does have a different feel just changing out the colors. I do like using blues during the winter time. Have a great week, my friend. Hugs.
DeleteThat is so pretty, I was just looking for snowman ideas. Thanks for sharing!
ReplyDeleteAaah thank you so much, dear. I have been all about snowmen this month. Lol. This one was a fast project to work on and was very easy. I hope you give him a try. Have a great week. Happy stitching.
DeleteGood afternoon, dear Mary and welcome back. I have missed you as well and had hoped all was well with you and your family. I am so glad to hear that it was just computer problems though that can be frustrating enough. Lol. You know me and tech stuff- I am not tech savvy . I have been quilting up a storm here lately. I go back and forth as to what is my favorite thing to work on. I just keep adding more and more projects to my endless list of things I want to do. Lol. I am so honored you are working on Dot's saltbox. That one is a dear one to me in honor of my dear Aunt Dot who was like a 3rd grandma. I hope you enjoy it. Brrr, stay warm and cozy. It is in the 40s' here as well, but it is supposed to get colder. Hugs and blessings
ReplyDelete