Monday, July 27, 2020

Christmas Barn- A Christmas in July Freebie

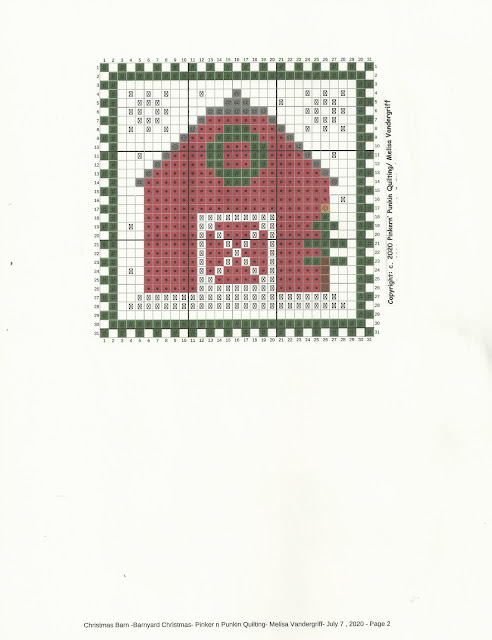
Hey, yall.  Can you believe this month is rolling to a close? So  many of you have been posting the sweetest Christmas projects that you have been working on. I have been so inspired and motivated  by seeing your stitching and finishing. I have another addition to my little Barnyard Christmas series, and it is called "Christmas Barn". It is a quick, easy stitch with a little, old, red barn with  a wreath on it.   

My Papa and Nanny had an old red barn where we stored hay and tobacco. It was so much fun to climb the tobacco poles  or help stack the hay. That barn is long gone, but luckily I was able to save scraps of wood from it.  I thought of Papa's barn as I stitched this piece; the roof however I stitched in gray because dad has his tin barn roof painted gray  from time to time.

  I stitched 2 of these little ornaments in a day. They are small with the stitch size measuring 31 x 31 which on 14 count aida brings it to about 2 1/4" squared. The first one I stitched on coffee/ tea dyed aida.  I finished it as a flat finish using foam board , raffia and jute twine from the Dollar Tree. The greenery is just snips off of an old Christmas wreath. 
The 2nd ornament I stitched on Rit Emerald green dyed 14 count Aida. I then dipped it in a bit of tea as well.  It was finished as a flat ornament with fabric covered foam boards. I twisted old homespun to make a cording to go around the edge of the foam boards. Jute twine was used as the hanger and the red ribbon came from the Dollar General for just $2.00. I love that ribbon. 

I hope you consider adding these to your Christmas stitching list. I am making these for my Farm themed Christmas tree that I hope to create. There will be 2 more coming in the next 2 weeks if nothing happens so I hope you will check back in with me.  Then I may move on to Autumn stitching.   
If you are interested in stitching  "Christmas Barn " click on the colored text for a pdf download. 
Click here for instructions. 

   Click here for colored chart. 

 Click here for the black and white chart.  

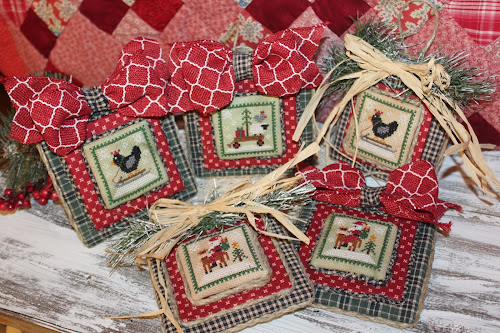
If you haven't checked out the previous ornaments, click on the colored text and it will take you to the other ornaments that I have  completed and offered as freebies. They are  Chicken Sled, Santa's Ride  and Special Delivery.  

 
 I would love to see your stitching. Please tag me on Instagram using  #pinkernpunkinquilting  or you can Direct Message me I would also love for you to follow me on Instagram and on the blog.  Thank you so much for checking my stitches out , and spending a little time with me.  And check back next week ; hopefully there will be another one. As always...
Happy Stitching, ya'll
Melisa

Saturday, July 25, 2020

The Summer Sunflower Tree

Hey, ya'll!  Come on in and see my raggedy little summer sunflower tree.  This is an old white tree that I can not bear to get rid off. Yes it is a little wobbly and crooked ,but hey, it gives it character. This little tree has now been transformed from patriotic to summer/ sunflowers. 
The tree sits in an old bushel basket that my grandmother painted about 40 years ago.


It is mainly decorated with Dollar Tree flowers that I have purchased over the years. 
I also included little chalkboards with sunflowers drawn on them. The chalkboards are actually scraps of rough cut wood salvaged from a building project; they were destined for the burn pile so why not making something from them. 


The large farm picks are from the Dollar General. I have them scattered all throughout the tree. To finish the tree off, I added some black and white buffalo check ribbon. The tree will see a little tweaking here and there, but for the most part I am happy.   
Thank you for visiting.
Melisa

Wednesday, July 22, 2020

Special Delivery-A Christmas in July Freebie


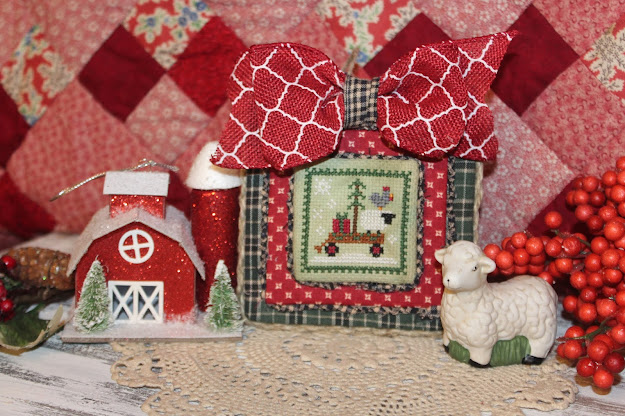
Hey ya'll. I still have been plugging away on making little ornaments for my Barnyard Christmas tree that I hope to create by December, and this little stitch is the newest addition. It is called "Special Delivery". 
In the hay wagon, is a small tree with a  gift from Santa underneath and of course there is a little ewe and chicken.
 
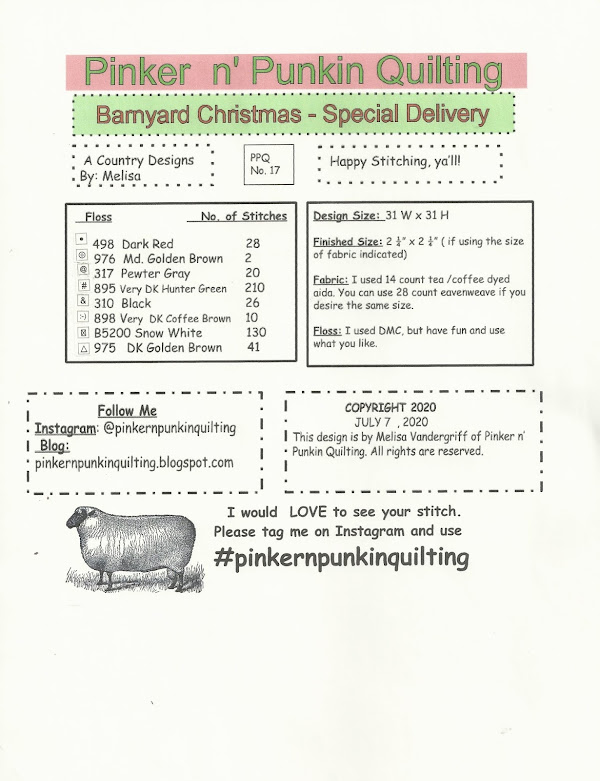
The design is the same size as Chicken Sled and Santa's Ride with a stitch measurement of 31 x 31.   If you haven't seen the previous designs just click on the colored text. 


This time, I stitched only one of these ornaments  on Rit Emerald green 14 count aida, but I have plans to stitch another on tea dyed aida. 

 I have attempted to put charts in a pdf format,  but I had to do them by individual page. If for some reason they will not come up, just direct message me on instagram and I will see what I can do with it. I am not very tech savvy.
 
To print instructions click here 
Instructions

To print Colored Copy click here. 

 To print Black and White chart , click here. 
I hope you decide to stitch "Special Delivery" in the future and if so I would love to see it Just tag me on Instagram and use #pinkernpunkinquilting. Please feel free to make any changes that you would like; I am not a designer and just use the floss and fabric that I have on hand. 

And as always, 
Happy Stitching,
Melisa

Tuesday, July 14, 2020

Santa's Ride- A Christmas in July Freebie

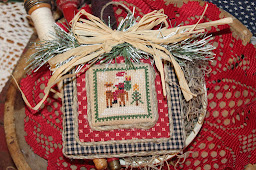
Hey ya'll. I hope you are enjoying a little Christmas in July stitching.  Some of you may know that I decided to design my own little ornaments along the farm theme in hopes of creating a farm themed tree this year. . This  week I have Santa's Ride as my Jolly July ornament. 

What farm would not be complete without a cow.  Well this little  prim Santa decided to hitch a ride on this cow's back. When I stitched her, I thought about the 1997 animated Christmas movie "Annabelle's Wish" which was about a young calf that dreamed of being a reindeer.  My girls loved that movie when they were young. So this ornament brings back some  fond memories. 


Now this is a very small ornament. I stitched mine on 14 count aida which brings the finished size of the stitch to about 2  1/4" square. I actually stitched 2 of these in a day so they whip up fast. 

One was on coffee/tea dyed aida and the other was on Emerald Green Rit dyed 14 count aida.  

I mounted mine one layer of thick cardstock board and one layer of foam board wrapped with old homespun. The bow was created from ribbon from the Dollar General which I love. I also used ripped homespun and jute twine from the Dollar Tree to create cording for each of the ornaments. 


If you didn't  see last week's ornament, Chicken Sled, I hope you check it out and maybe consider stitching it too.    Also I would love to see your stitch so if you post on Instagram , tag me and use  #pinkernpunkinquilting  


As always,
 Happy Stitching, ya'll.
Melisa 

Thursday, July 9, 2020

Goodbye Patriotic Quilts, Hello Summer Quilts-

Hey, ya'll. I thought I would pop in and share my country foyer.   In the foyer, I have a small shelf where I display lots of country clutter/ knick knacks and quilts. The quilts are displayed on old shutters at varying heights, and I change them out seasonally.  Well, it is time to say goodbye to the patriotic decor and hello to late Summer decor.

Nestled next to the quilts is a little tree that stays up all year. It is nestled in an olive bucket which is then in an old rusty enamelware bucket . For the Patriotic season, I simply decorated it with honeysuckle vine harvested from my property and paper stars that I cut out and glued to a jute twine. A homespun bow topped the tree . Below the tree a chicken in a crock and a patriotic camper. 

On the shutters are some old quilt tops and wool applique. The blue  Bow Tie quilt was purchased years ago at an estate sale  and is hand pieced and quilted. 
For the late Summer, I always like to pull out quilts made from my girls' clothing- one is a hand appliqued coneflower quilt and on top of it is a cotton and wool applique quilt.  Watermelons, chickens, sunflowers are the theme for the late Summer decor. 

 On one of the doors hangs a quilt from a wreath. I love that little patriotic crow. 
  Can you tell that I love color? The foyer shelf is filled with  all kinds of colorful country clutter and I enjoy it all. 
  This Lizzie Kate freebie called "Freedom"  is the newest addition to be added to the foyer shelf. It can be found on the website. 

For the Summer tree, I  added in some sunflowers to the existing decorations and put a little farm screen around the bottom of the tree. I still have to do a little tweaking and things may be removed , but that is how it is looking today. 

Thank you so much joining me in my country foyer and seeing the changes I made. Have a great day.
Melisa

Tuesday, July 7, 2020

A Chicken Sledding? A Christmas in July Freebie

Are you participating in Jolly July and getting in some Christmas stitching? I plan on doing a little. Last year, I worked on a lot of Christmas projects in July, but this year I decided to make it a little simpler and do one big project and some small ornaments.  I LOVE Christmas and come November 1st ( maybe sooner) Christmas trees will be popping up all over my house. I love to do themed trees and have been wanting to do a farm themed one for years. Lol I  have a farm so why do I not have a farm tree? So among the many farm ornaments I am  currently working on, I decided to try to chart some of my own and the first one is called "Chicken Sled". I thought maybe all of  you "farm themed" cross stitchers might want to stitch it  and add to your Winter farm decor too.  Now remember, I am not a professional designer ; I am learning and playing with charting and am  loving every minute of it.  


 This design is a small at only 31 x 31. I stitched 2 in a few hours.


Both were stitched on 14 count aida, but one was on tea/coffee dyed aida while the other was stitched on Emerald green Rit dyed aida. 

The first one, I stitched as an ornament and finished it on foam board. I attached it onto 2 fabric covered pieces of foam board . The trim is jute twine from the Dollar Tree that I tripled, twisted, and glued in place. I added a raffia bow ( raffia from the Dollar Tree) ,  some greenery and called it a finish. 


The 2nd one was an experiment using the Rit Emerald green dye, and I think I like it. I finished it the same way, but the trim is homespun twisted and glued in place. The stand is from the Dollar General for only $4.00. 


I hope you consider stitching this little guy, and if you do, I would love to see it. Of course you can change it up to however you would like it.  As always ... 
Happy Stitching ya'll
Melisa
If you have trouble printing it, just direct message me on Instagram and I will see what I can do. I only know how to scan the charts and enter them right now. 

Thursday, July 2, 2020

A Berry Sweet Tiered Tray

Hello there friends! Join me in the kitchen to see  my  galvanized  two tiered tray all decorated. 


Now normally,  this tiered tray  would be decorated for the patriotic season but this year I kept my strawberry decor in the tray. This tiered tray is located near my corner upstairs kitchen sink.  I filled it with thrifted items such  chickens, vintage Fire King cups, a crotcheted doily , strawberry cups and a chocolate covered strawberry dish- all purchased at the Goodwill. I also included my red mason jar chicken salt and pepper shakers, sprigs of floral picks,  and Pioneer Woman salt and pepper shakers and bowls.  


Near my tiered tray is a Pioneer Woman utensil crock - purchased at the Goodwill. It is filled with vintage and antique kitchen utensils. It is a fun little display . Now to think of a new  vignette for this tiered tray. Have a lovely day. 

Wednesday, July 1, 2020

Bees, Blooms, and Chickens- Oh my! Freebie


 Hello, my dear friends . Can you believe it is already July? What an unusual 1st half of the year we have had.  Well, some of you know that I have been playing around trying my hand at a little designing or charting. I have always drawn and painted , but this is the 1st time I have charted anything. After posting a photo of one of my stitches I  was tickled when other stitchers expressed interest in the design.  

When I began to design this little piece, I originally started with a small scrap of fabric-- I was determined to squeeze some stitching onto this scrap. Waste not want not.  I knew I wanted chickens and bee skeps in the design as well.  It did not take long for me to have this little piece all sketched out.
As I drew I thought about our chickens that we once had. We have had a variety of chickens over the years and since I have always had an affinity for black chickens, they had to be included.   In the design, there is even one little chicken that is tailing at the skirt tail of the farm girl. This reminds me of one of our chickens, Lucy,  who as soon as we opened the truck door she would scoot right around us and into the truck seat she went. She was ready for a ride. 

Now there are a few differences in my design compared to the stitched piece, but very minute changes.   I stitched this up in a day so it is a quick stitch and a small. 


 When it came to finishing, I had all kinds of ideas on how to FFO this piece and had several thrifted items laid out , but at the last minute I remembered I had a wooden box that I had bought at the thrift store, and it fit perfectly. I just tacked it down with  a little tape because I may want to change it out later . `
   Anyway,  I thought I would post  this little design on my blog ( which I am new to as well- lol isn't learning fun). Now remember I am not a professional designer but someone who is playing around right now.   I am also not too tech savvy so I do not know how well this will show up on the blog. Please forgive me if it is not just right. Lol I'm learning.  If you take a hankering to stitch this piece,   please tag me on instagram or E-mail me a photo of your finished piece because I would love to see it.  And by all means if you feel like changing it up, please do so whether it be in fabric or floss choice- I  always  just use  what I have on hand. 

Click  here for the instruction page

Click here for the colored chart. 


Click here for the black and white chart. 

 Happy Stitching, ya'll and thank you so much checking me out. 

Be Kind. Be Happy. Be Positive .  Be Creative. 

Melisa


Popular Posts

Wordless Wednesday- Nature on the Road