Pages

Sunday, June 30, 2024

Blackberries , Strawberries Oh My! And Strawberry Stamp Header Freebie

Grab ya' a bowl!  The cobbler is ready! I am sure I can rustle up some ice cream and a  cold glass of milk or perhaps coffee. Whichever you like will be dandy! 


Blackberries are getting ripe!   I have been eating them by the handfuls right off the bush.

 The other day, I put on my garden boots and headed out to the farm to pick a few which are growing along the fence line.  I thought I better pick some before the heat dries them up into nothing.  

  
Don't they look yummy?! 


 I picked around 6 cups  and by golly, the next morning  I awoke to find  Mr. Pinker busy in the kitchen   baking a cobbler.  Eeeh ! He is a keeper!


 Last year I shared a 1 cup Blackberry Cobbler Recipe that is baked in an iron skillet. If you would like to read that recipe, just click the colored link.  

This year, Mr. Pinker decided to try another recipe. He called it the $2.00 Cobbler because we had most of the supplies on hand except for the canned biscuits. 

Mr. Pinker got creative on arranging the biscuits.💙💜😀


 It was delicious, but I have to admit it was not like Mom's . LOL. Do you do that?- Compare cooking to your mom's or grandma's?  I do all that the time. 👵🙄😀😋

 Anywhoo, Mr. Pinker made it a little runny or should I say juicy just like we like it.  😀 He said the next time he fixes it , he will leave off the bottom layer of biscuits in the baking dish.   If you make this recipe, adjust it to your liking. 


Blackberry Cobbler

INGREDIENTS:
4-6 cups of fresh blackberries( depending on size of berries) rinsed and drained
1 cup of sugar
2 packages of canned 10 count biscuits
1/2 cup of water
1 Tablespoon of lemon juice
1/2 teaspoon of vanilla extract
pinch of salt
1-2 Tablespoons of corn starch
DIRECTIONS:

1. Rinse and drain berries.
 
2. Place the berries in a large bowl and add 3/4 cup of sugar. Gently mix and refrigerate for a couple of hours. 

3. Preheat oven to 375 degrees.

4.  Place chilled  berries in a saucepan and add a 1/2 cup of water. 
5. Add a Tablespoon of lemon juice , a teaspoon of vanilla extract and another 1/4 -1/2 cup of sugar depending on taste. Let mixture simmer for about of 5 minutes until it produces more liquid.

6. Then add 1- 2 Tablespoons of cornstarch and a pinch of salt.  

7. Allow mixture to simmer for another 5 minutes. 

8. Flatten 6 small canned biscuits into a lightly greased baking dish.

9. Bake at 375 degrees for 10 - 12 minutes or until almost done. 

10. Remove from oven and pour in berry mixture. 

11. Cut 6 biscuits into sections for dumplings and mix in with berries. 

12.Take remaining 8 biscuits , flatten and place on top of berries for crust. 

13. Bake in oven at 375 degrees for 12-15 minutes or until golden brown.

14. Remove from oven , brush a little butter on top and sprinkle a pinch of sugar.

15. ENJOY!


                                                    Graphics from Pinterest. 
                                            
 Did you notice the gorgeous plum colored dish cloth under the bowl of berries?  

My dear friend Karen sent it to me along with 2 others . Aren't they scrumptious?! 

 I marveled over the design that she knitted- so beautiful. Thank you, Karen. 🤗 I love them and of course they will be out year round.  I immediately  put them on display - too cute to use for washing dishes. Hee! Hee! 

First, I rolled them and placed them in a Pyrex bowl  ,but soon they found their way into a pitcher on the baking table along with   the apple pie dish that Karen gifted me.


Am I  being long winded today? 🌬🌬🌬  But oh ,  I do have  a few other things to share if you don't mind. 

 I created a header for the Strawberry Stamps if anyone is interested. I am going to restitch all of my Strawberry stamps into one big piece. I originally stitched the stamps using DMC 498 as the border but for the large piece I may use DMC 930. What do you think? I think that would look snazzy . 

 I STITCHED MY DESIGN ON 14 COUNT AIDA THAT I COFFEE/ TEA DYED MYSELF.

🧵🧵🧵🧵🧵🧵🧵🧵🧵🧵🧵🧵🧵🧵🧵🧵🧵🧵

If you are interested in stitching this piece,  just grab , the images. For printing tips, refer to the post Tips for Printing which has loads of tips from my sweet friends. 

🧵🧵🧵🧵🧵🧵🧵🧵🧵🧵🧵🧵🧵🧵🧵🧵🧵🧵


If you have missed any of the other strawberry stamps, I invite you to hop over to the previous posts by clicking on the colored links. 


 I want to thank all of you who have followed along with me on my Strawberry Stamp journey as well as all of the encouragement, support and for stitching along with me.  

Before you leave, I wanted to show you my Strawberry Quilt too.


 Another wonky scrappy berry has been quilted. I am moving slow but sure on this one. 


By the end of the day, I plan to have one whole row of berries completed. 


Well , Sweeties, I am off to enjoy the day!  Have a spectacular Sunday yourself  and ...

 As Always...

Happy quilting and stitching, y'all

Melisa

"Happiness is picking blackberries on a sunny summer day. "

Hugs and Stitches!!! ðŸ¤—❤🧵

Dedicated to my sweet baby sister, Amy . This quilt is for you. I love and miss you so much, Amo! 💗💗💗

I am joining these lovely ladies' link parties. I hope you check them out; they always have so many wonderful projects going on and provide the opportunity for other needle workers to meet.

Angela of  So Scrappy  for Scrap Happy Saturday

Nina at Creations, Quilts, Art , Whatever by Nina for Off the Wall Friday

Frederique at   Quilting Patchwork Applique for Patchwork & Quilts - Saturday

Kathy at Kathy's Quilts for Slow Stitching Sunday

Kate at Life in Pieces for  Stitching Stuff ( Sunday) 

Cynthia at Quilting is More Fun Than Housework for Oh Scrap - Sunday 

Melva at Melva Loves Scraps for Sew & Tell- Sunday

Brenda at Songbird Designs for Monday Musings

Judy at Small Quilts and Doll Quilts for Design Wall Monday

Carol at Quilt Schmilt  for To Do List Tuesday 


Thursday, June 27, 2024

The Marcher of the Flag- A Patriotic Freebie

It's another beautiful summer day!  
Welcome , Sweet Friends and Happy Thursday! 

For the last couple of days I have been busy working on more   Happy Scrappy Flags . This is my leader / ender project. 


80  Happy Scrappy Flags are completed and more will be in the works. 

Bear Indian fabric, old stripes from the 80's and Christmas fabrics

These are just a few that I pieced yesterday when I was working on my hourglass blocks. 


This is my favorite! Ladybugs, butterflies, flowers and angels- Perfectly scrappy if I do say so. 

Block measures 5 1/2" x 6 1/2" unfinished

Last year  I showed a design called  The Marcher of the Flag when I shared my My Red, White and Blue Hutch Tour.
2023 Patriotic Hutch

If you would like to see any of the stitches on last year's hutch tour,  just click on the colored link above. 


I stitched The Marcher of the Flag  in 2020 after my daughter finished boot camp in  2019 . 

Brave Men and Women. Such Patriots and Heroes! 

She was one of the airmen who carried a  flag during the graduation ceremony.  She carried the Air Force flag while a male airmen carried the United States flag. It was such a deep honor. 

It brought me to tears to be present among these brave mean and women. 

May I add that I am one proud Mama. 😀


Anywhoo, any major event that she had in the Air Force I stitched a piece for or am in the process of stitching . 


The Marcher of the Flag includes a sweet patriotic lass marching the flag with "Liberty" , her eagle by her side. 


Lots of quilted stars surround her. 


I finished The Marcher of the Flag on a "fall " wooden plaque that I found at the Goodwill for a dollar. I added some patriotic fabric and pom pom trim around the stitch. The bow is made from fabrics in my stash. 


There  are  12  DMC floss colors in this piece including: DMC 310,  353, 898, 435, 783, 3345, B5200, 347, 311, 334, 815, 938

 I STITCHED MY DESIGN ON 14 COUNT AIDA THAT I COFFEE/ TEA DYED MYSELF.

🧵🧵🧵🧵🧵🧵🧵🧵🧵🧵🧵🧵🧵🧵🧵🧵🧵🧵

If you are interested in stitching this piece,  just grab , the images. For printing tips, refer to the post Tips for Printing which has loads of tips from my sweet friends. 

🧵🧵🧵🧵🧵🧵🧵🧵🧵🧵🧵🧵🧵🧵🧵🧵🧵🧵


Today the youngin's are here.  They have been having lots of sleepovers. I am not sure what they  will get in to, but I bet my bottom dollar that they will be wanting to go swimming or fishing.

In closing, I would like to thank all of those who have served in the military  and the families of those who have served too. 

  I wish you a fabulous day doing what you love and thank you for dropping by to see my stitch. 

 As Always...

Happy quilting and stitching, y'all

Melisa

Strength, Courage , Pride- Our Military

Hugs and Stitches!!! ðŸ¤—❤🧵

This sweet stray is considering adopting us. She is still skittish,  but she and two sisters have been visiting me each day. 
Dedicated to my sweet baby sister, Amy . I love and miss you so much, Amo! 💗💗💗

Other Posts That Might Strike Your Fancy!

🌞Parade of Homes- Early 2024 parade of home freebies.
🌞A Berry Nice Parade- A Parade of Past Strawberry Freebies   2024 Parade of Strawberry freebies as of May 2024
🌞Root a Toot Toot - A Patriotic Parade -  An early 2024 patriotic parade  of previous freebies. 
🌞Buzz Buzz Busy Bee Parade-  An early 2024 bee freebie parade. 
🌞Messin and Gommin in the Kitchen -  2022 post on how I tea/ Coffee Dye my fabric. 

Wednesday, June 26, 2024

Scrappy Hourglass Blocks

Good morning, Sunshine. Please join me in the quilt room. I am sewing up a storm and need all of the help I can get. 😀

 On the agenda today is Scrappy Hourglass blocks. 
 
Grab some scraps and pull up a seat.

 Do you mind cutting those fabrics into 4 1/2" blocks?  I will be making 3  1/2" unfinished blocks today.  

 I always forget the formula for hour glass making.  Are you like that ? 

Anywhoo.  I have listed the formula and a tutorial mainly to  help this old gal out when piecing.  You can bet your bottom  dollar I will be referring back to this post quite often. 😀🤔

HOURGLASS BLOCK  FORMULA  FOR CUTTING FABRIC- Take the desired finished block size you have in mind and add 1 1/2" . For example I want a finished 3 "  FINISHED hour glass block so  I add 1  1/2" and cut the fabrics accordingly. 

3" + 1 1/2" = 4 1/2" 

FABRIC NEEDS FOR  4 SCRAPPY HOURGLASS BLOCKS

Cut 4 - 4 1/2" x 4 1/2" squares from 4 different fabrics

DIRECTIONS: ( Use 1/4" seam allowance. ) 

🧵1. Cut 4  4 1/2" x 4 1/2" squares. 

🧵2. Cut each square on the diagonal twice.  You will end up with 16 HST. 

Lines are drawn to cut on the diagonal twice. 


🧵3. Arrange 4 triangles into a pleasing scrappy hour glass block. 

Arranging the 4 scrappy triangles

Pair the triangles off. 

🧵4. Sew 2 triangles together down the sides of the triangle creating a flying geese unit. 

The two triangles are sewn together. 

🧵5. Repeat for the 2nd pair of triangles.

🧵6.  Take  your the units created in Steps 4 & 5   to the ironing board and arrange the triangles as you would when making the  scrappy hour glass block. Press seams in opposite directions so that the seams nest. 

Arrange triangle on the ironing board . Press seams in opposite direction so seams nest. 

🧵7. Place the triangle units right sides together, and pin in place where the seams nest and at each end.

Units are ready to flip and pin. 

Pin triangles together at center and corners. 

🧵8. Sew the units together down the base of the triangle units. 

Sewing the hourglass block. 

🧵9. Take hour glass block to iron board and press the seams open to reduce the bulk.

Seams pressed open. The dog ears need to be clipped. 

🧵10. Return  to the cutting mat and trim the dog ears and square the block up. It should measure 3 1/2" unfinished.  Using a square ruler , line up the diagonal drawn line on the ruler with the diagonal seam . 

Lining up the diagonal seam with the diagonal line on the ruler. 

Trim on the top and side.  Rotate the block and repeat the same step - lining up the diagonal and previous trimmed sides then proceed to trim .Remember to check your measurements before continuing to trim.  

Using a ruler with a diagonal line, line up the diagonal seam and trim 2 sides. 

Rotate the block and trim the other 2 sides. 


🧵11. Using the remainder of the triangles which were cut in Step 2, continue making hour glass blocks. You will end up with a total of 4. 

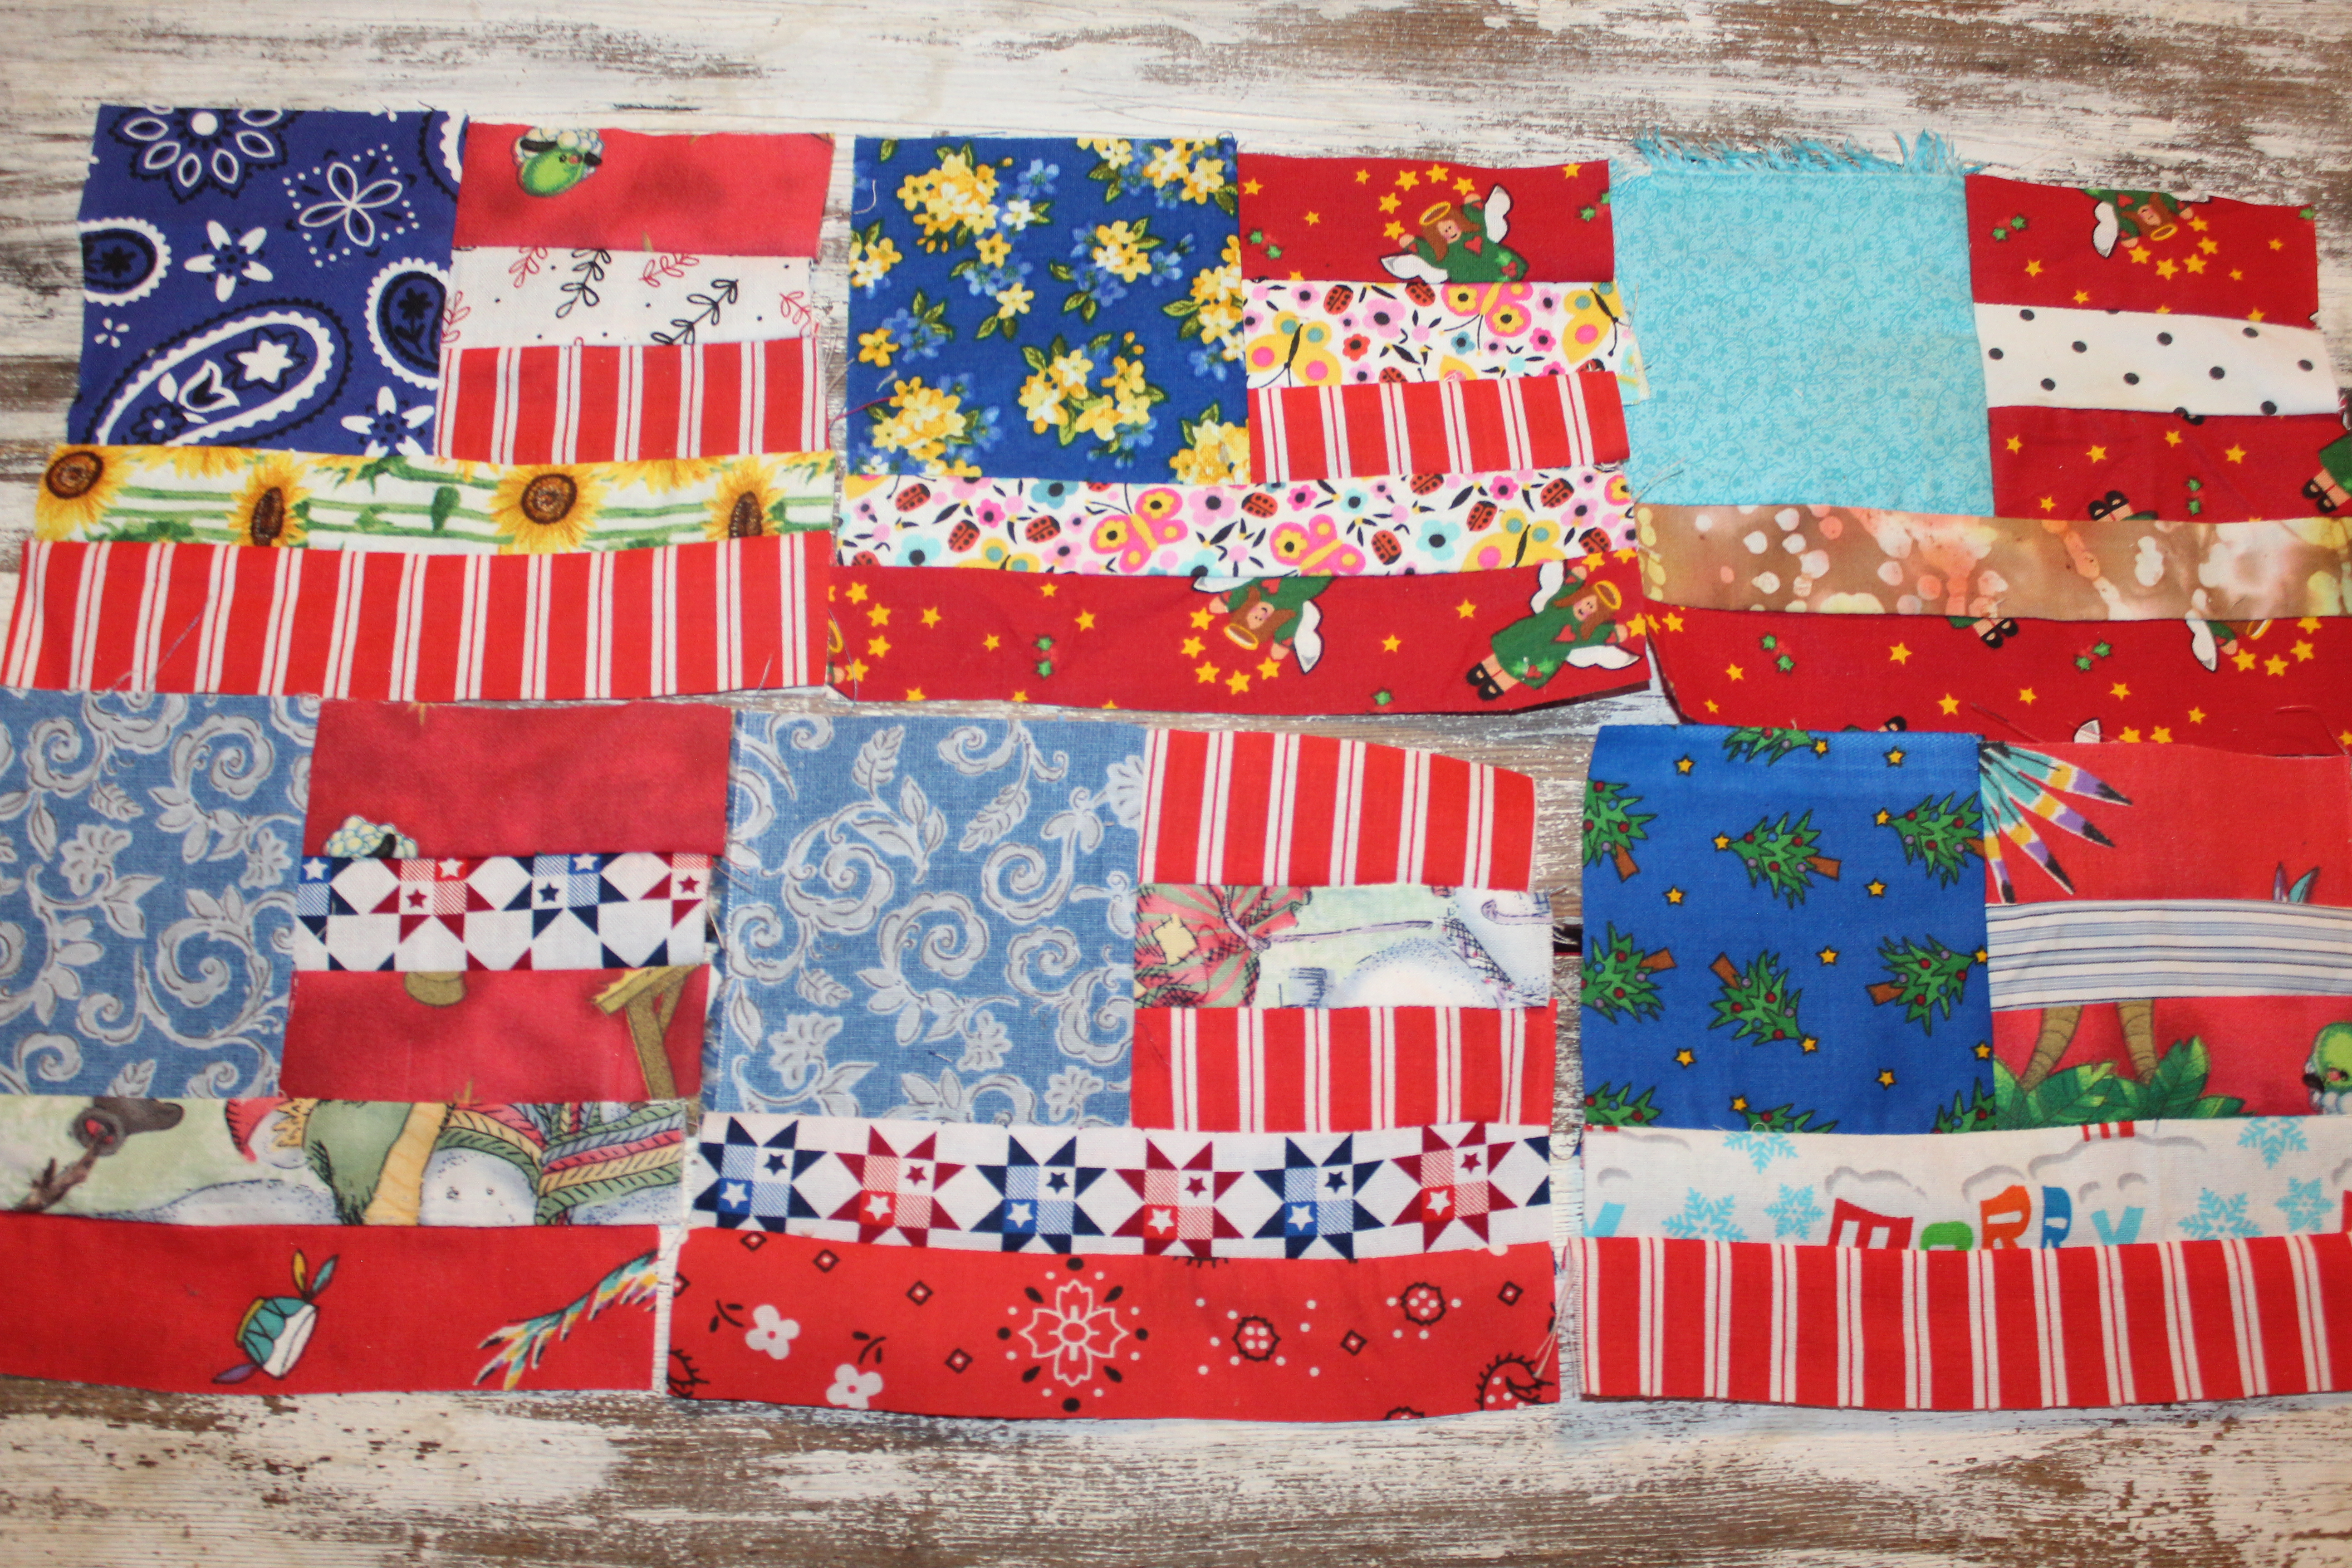
🧵12. Wahlah! Your cutie patootie scrappy hourglass blocks are complete! 

Today I will be making more Scrappy Hourglass Blocks. These are going to be added to the Sunny Rails and Happy Trails quilt that I am working on.


Thank you so much for joining me in the quilt room today and...

As always,

Happy Stitching and Quilting, y'all

Melisa

Time is a gift; use it wisely. 

Hugs and Stitches!!! ðŸ¤—🧵

Dedicated to my dear sweet, baby sister, Amy  I love and miss you , Amo. ❤❤❤❤